| Complete Details Manual click HERE  Excavation - Foundation
 Panels
to Footing - Details: 10 , 11, 11b, 11c, 12, 13, 13b, 14, 15, 16
Panels
to Footing - Details: 10 , 11, 11b, 11c, 12, 13, 13b, 14, 15, 16
Use of typical hold downs in footings
Panel Installation
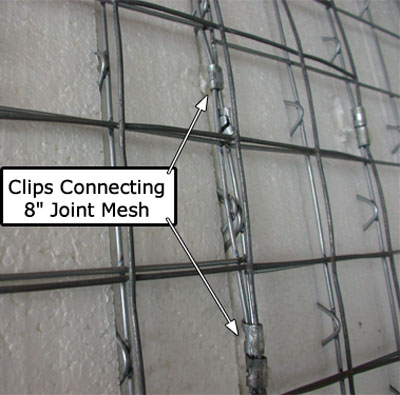
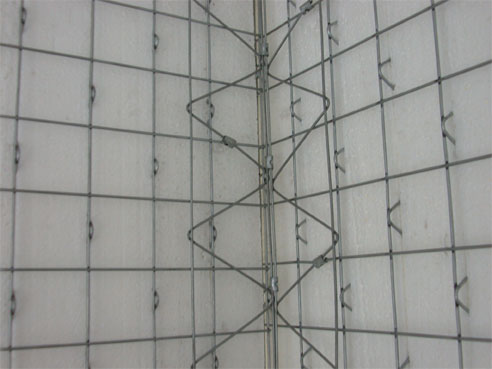
Panel to Panel - Flat Connection Picture - Details: 33, 34, 35
An 8" Joint Mesh is laid over the 2 edges of the panels being connected end to end and "clipped" to the panels using "Clips"
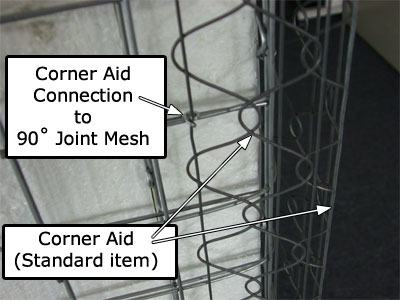
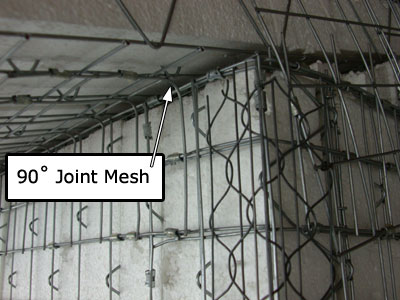
Panel to Panel - Angled Connection Picture Ext - Picture Int
A 90° Joint Mesh is laid over the interior & exterior corner edges of the panels being connected and "clipped" to the panels using "Clips".
A "corner aid" is clipped over the 90° Joint Mesh outside corner to help with cement thickness consistency
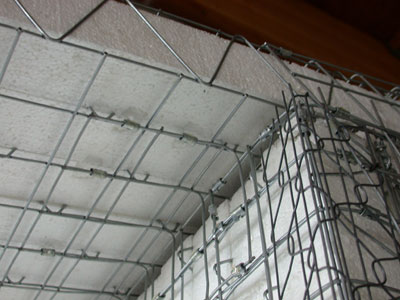
Panel to Roof - 90° Angle Connection Picture1 - Picture2
A 90° Joint Mesh is laid over the interior corner edges of the panels being connected and "clipped" to the panels using "Clips".
Panel to Roof - Various Angle Connection
A Joint Mesh is laid over the interior corner edges of the panels being connected and "clipped" to the panels using "Clips".
Electrical - Plumbing
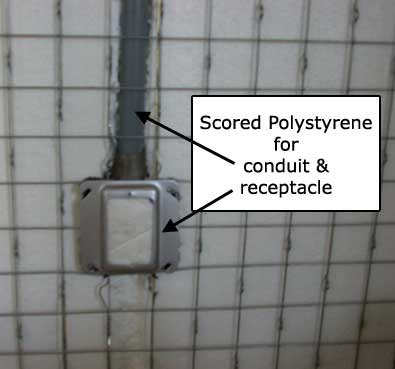
Electrical Picture - Details: 32
The polystyrene is scored (or melted) to allow for the conduit and receptacles to be installed.
Doors - Windows
Doors Picture
Truss Strips are used as Headers and "clipped" to the panels.
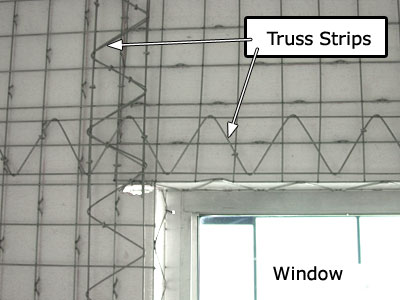
Windows
Truss Strips are used as Window surround and "clipped" to the panels. Picture
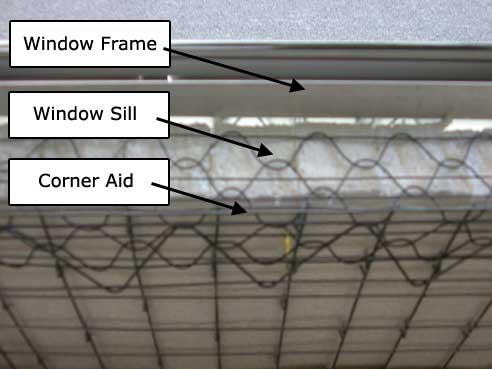
Corner Aid is used on the window sill Picture of Sill
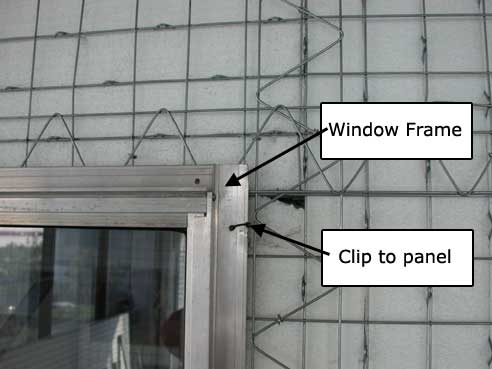
Window frame is attached to panels with clips Picture of Frame
Concrete - Plaster Picture
Concrete, Gunite, or Plaster is shot on both sides of the panels. |
